Get Shift Done: Tips and Tricks
Even if you began using “team communication” tools with IRC, you can appreciate Slack’s virtues, such as automation features and connectivity with other tools. For instance, you can send a task straight to Asana (a full-featured task management system), which creates a solid connection between team communication and the action items on which to follow up.
Even better, using a tool like Zapier to connect Slack to Asana can save time and help with task delegation. Instead of adding a task to two separate applications — once to Slack and again to Asana — you can click on the star on the Slack item and Asana is updated.
It’s surprisingly easy to set this up, though the initial configuration includes a few steps to ensure everything is connected correctly.
I assume you have both an Asana account and a Slack account with administrator role capacity, and that you’re logged into Asana and Slack in the same browser. Zapier looks for your accounts to test the process even while you are setting it up.
Once you are logged in to your Asana and Slack accounts, go to Zapier.com and sign up for an account, if you don’t already have one. (This is a good first project for Zapier in any case.) The free version of Zapier allows five Zaps, recipes created by other users or the Zapier team (comparable to IFTTT applets).
Once you’re logged in to Zapier, click on Explore in the menu, and type Slack in the search box. The Slack app shows up in the search result.

Select the app icon. Scroll down the page to see applicable Zaps, including the one labeled. “Create Asana tasks for new starred Slack messages” and click on “Use this Zap” button.

The first page of the Zap creation is an introduction. Check the left hand panel to confirm that the Slack icon and the Asana icon are displayed, then choose the “Create this Zap” button to proceed.

You should see the icon for Slack and the icon for Asana in the left hand panel. To get started, click “Create this Zap.”
The first time you set up a Zap, you are asked to authorize any affected accounts. In this case, you need to authorize both Slack and Asana.

Zapier requests access to your Slack account. Click Authorize to start the connection process.

Once you have authorized the connection between Slack and Zapier, you are asked to run a test. Go to your Slack account tab. Create an item and star it to confirm that Zapier can connect to your account and recognize your newly-added task.

Go back to your Zapier tab and click test.
You can bypass testing by clicking the Save + Continue button but I recommend running one test to confirm that your connection is working properly.

Zapier asks you to confirm that you have at least one starred message. Click Fetch & Continue to proceed.

Now that Zapier can connect to Slack, the next step is to connect to Asana. Once you see the “Test Successful” screen, you can confirm that it worked by clicking View your starred message. After you confirm that your message worked, click the Continue button to start the process for connecting Asana to Zapier.

To start the connection to Asana, select an Asana Action. In our example we aim to create tasks based on starred items in Slack, so select Create Task and then click the Continue button.

Confirm the action and click Continue again.
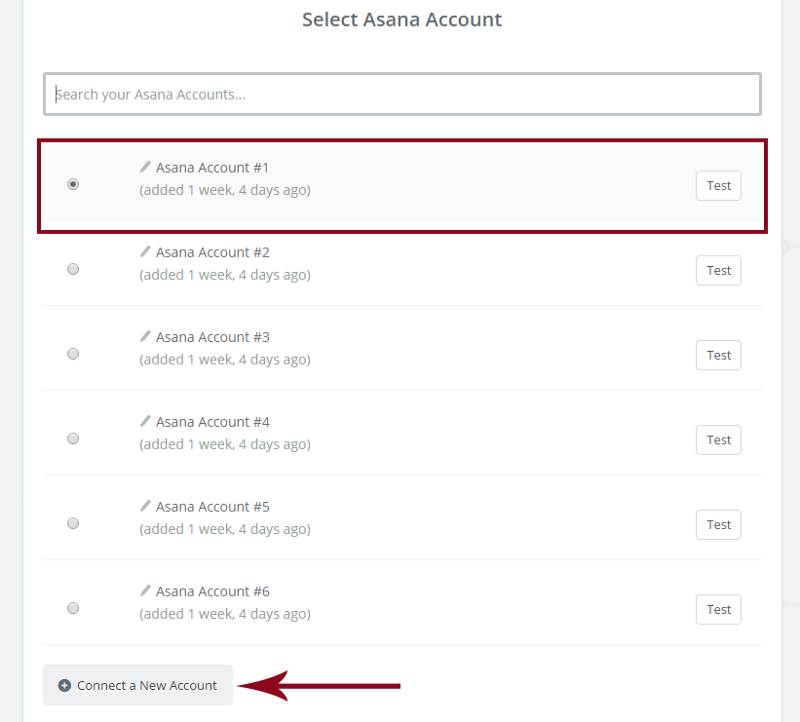
If you are new to Zapier you get one Asana account. Make sure the radio button is selected for the account where you want to receive your starred Slack items. (I just happened to do a lot of testing!)
Don’t see the account you want to connect? Click on Connect a New Account and go through the connection process again.
When you have selected your Asana account the next screen is to Set up Asana Task. For each field, click on the arrow or click on the small box on the right for your options.
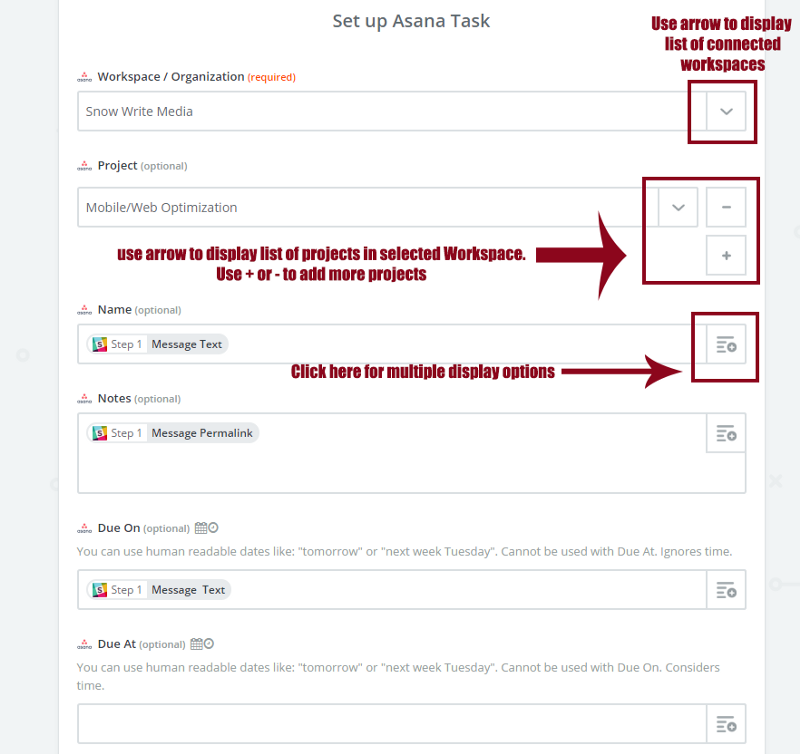
Use the arrows on the right-hand side to select your Workspace, project, and the data to display on your Slack -generated Asana tasks. You have several options.
- The only required field is the Workspace/Organization field; you can create one Zap per Workspace if you have more than one.
- You can add multiple projects, and modify the name and notes field by adding information like “Message Text” or “User Name.”
- If you want to set a due date, you can add “Due on Tuesday” or “Due on next week Thursday” to your starred Slack item.
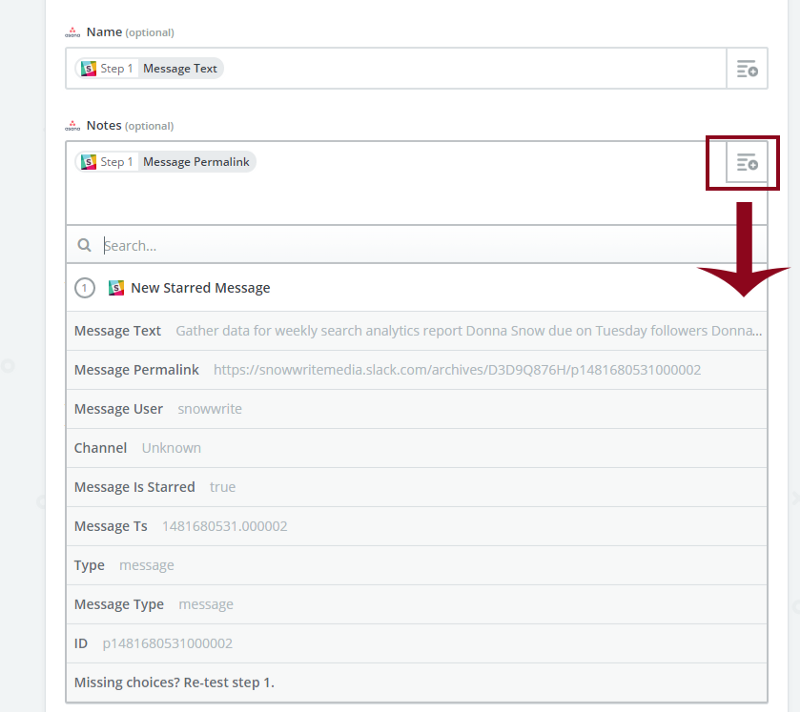
Include choices based on your team’s business process. I recommend you add Message Permalink to the Notes at a minimum, as it provides a reference point to the original Slack item within the Asana task.
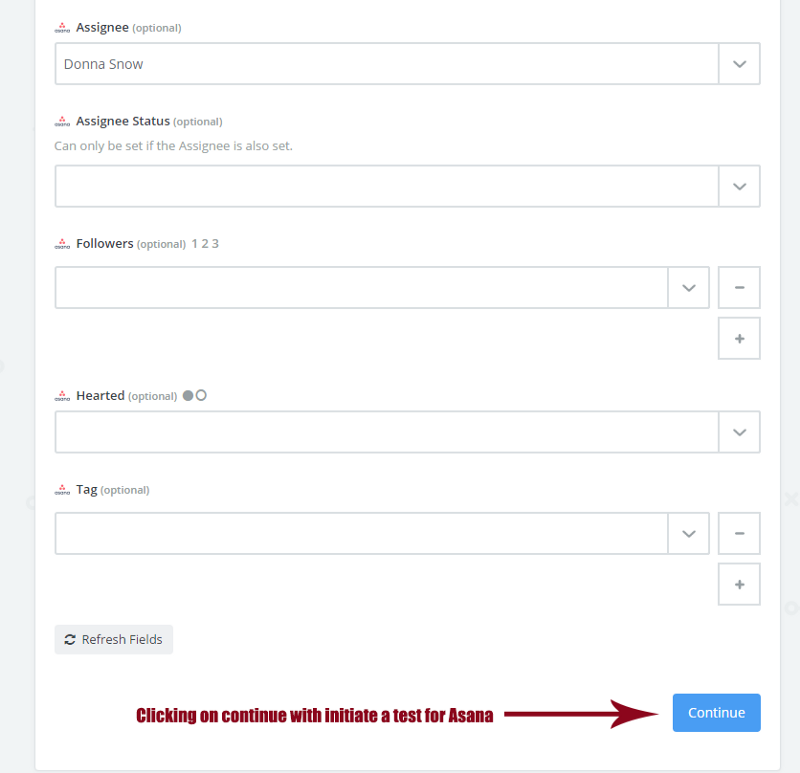
Finish filling out the fields for Asana setup, then click on the Continue button. This initiates a test for Asana.
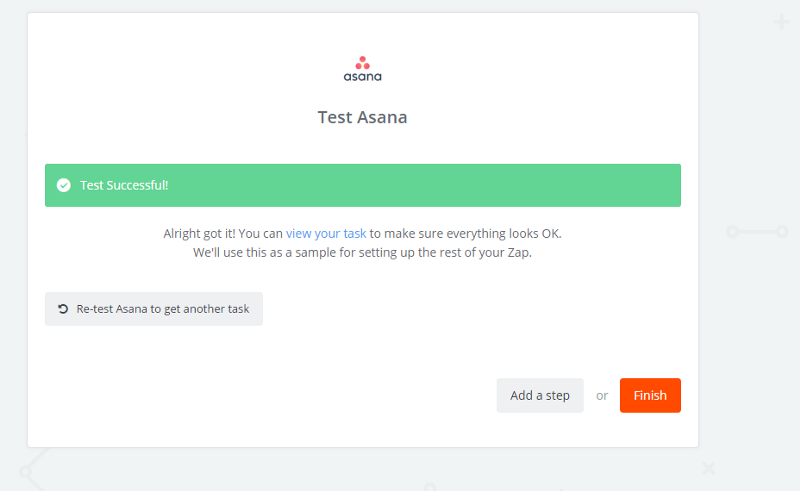
Finally, you see a Test Successful screen. You can either go back and add a step or Finish the Zap.
Now go back to your Slack account and add a new item to make sure your new Zap is working properly. Here, I typed into Slack, “Gather data for weekly search analytics report due on Tuesday followers” which incorporates my to-do item and due date.

Enter your item in the chat box.

Click on the “star” to make your new item a starred item, which triggers the update to Asana.

The final step is to check your Asana account to make sure that the newly- starred Slack item shows up as expected. It takes a little while, so get a cup of coffee.
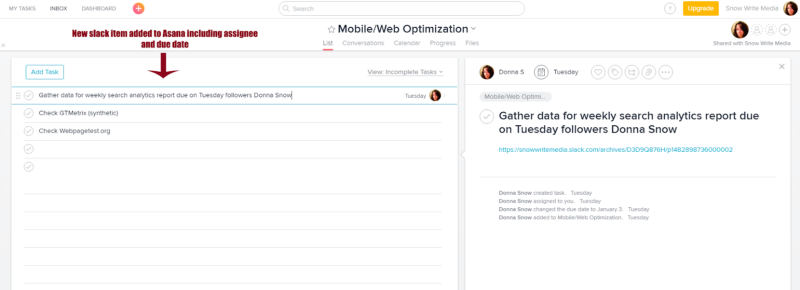
Hurrah! It works!
From now on, when the team is excitedly chatting in Slack about an upcoming project and action items are introduced, you can add a line in Slack, star it, and the item will update in Asana. No more scrolling up or trying to remember what to search for as your information is available in your Asana account.
That’s a real boon for productivity.
GSD: Tips and Tricks is brought to you by Xero, the cloud accounting software solution for your small business. With Xero, you can log in anytime, anywhere to get a real-time view of your cash flow and manage your books. Start your free 30-day trial today.